Install Vault on a Windows PC or Server
For a trouble-free experience, you’ll need to run the installation using a Windows account that has administrative privileges (right-click, Run as administrator).
After signing in to Vault, click Download Nimbox Vault App, and choose New Windows Client (beta):

If you are asked whether you want to run or save the file, click Run:

Once the installer file has downloaded, it will automatically launch. Select your language:

The setup wizard will start. Click Next:

Read and then accept our licence agreement. Click Next:

Choose the install location (by default this is C:\Program Files (x86)\Nimbox Vault). Click Next:

Click Next again to begin the installation:

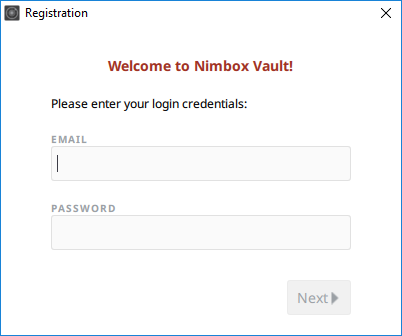
After the installation has completed, click Finish. You will now be asked to sign in to your Vault account. Enter your email (or domain credentials) and password. Click Next:

Accept the default location, or choose a custom destination for your Nimbox Vault sync folder. By default, your Vault folder is located in C:\Users\Account Name\Nimbox Vault. Click Next:
Choose whether to sync all files, or just specific content:
That’s it! Vault is installed on your PC or server. Click Finish to launch the app and get started.
You can now view your files by clicking on the desktop shortcut, or by using the link in the Favourites menu: